I thought I was growing old and out of shape when I started noticing knee pain after riding. But, it turns out it wasn’t my knees that were the problem at all, even though they were taking the brunt of it. The problem was that my pedal was wearing out and needed replacing.
When Should I Replace My Bike Pedals?
Pedals need replacing when you notice wear on the bearings, on the pedal body, or both.
There isn’t a hardcore set time frame or mileage to follow. Pedals may need to be replaced anywhere from 20 weeks to 20 years. Some pedals last about 2,000 miles, while others may go for 15,000 miles or more.
Please don’t assume, like I did, that you’re out of shape or getting old. It could be the pedals need replacing. Worn-out pedals can cause issues like accidentally unclipping in a sprint or hip and knee pain.
Of course, keeping up on pedal maintenance and ensuring they are kept clean, especially after a muddy ride, will extend the life of any pedal.
Knowing when to replace your bike pedals depends primarily on:
- How hard do you use them
- How well they are maintained
- What style and brand they are
It’s important first to know signs that the pedals are wearing out. However, it’s also necessary to understand how pedals work and what kind of pedals you have.
Why Do Pedals Wear Out?
Pedals take the brunt of every rotation of your feet. Your pedals handle a lot of force with each turn, over and over again, for miles of ride time. Yet, they typically do so with ease and silence. The surface on the pedal tends to be small, and the bearings inside are tiny.
Let’s start with the pedal parts and why they wear out.
Without the pedals, bicycles are just scooters propelled by pushing your feet against the ground. Instead, the pedals make a difference between a scooter and a bike. The pedals turn the two-wheeled mode of transportation and sporting vehicle into a functioning bicycle.
It’s pretty amazing when you realize that the pedal is the one component on the bicycle that stands up to many beatings. The rider’s weight gets pressed into the pedal on every pump and turn.
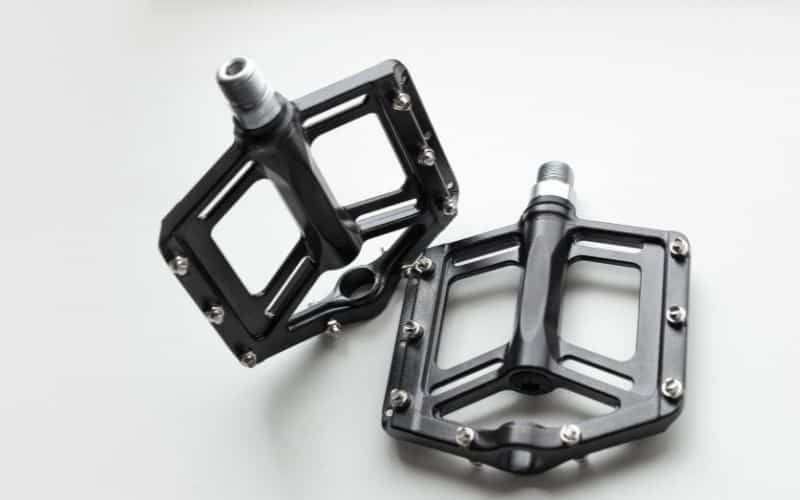
Pedals consist of the pedal body and bearings that help them turn. Simply put, pedals are more than a platform to rest your feet. They are an integral component of cycling.
Pedals attach to the cranks and are responsible for transferring the power from your legs to the drivetrain.
Worn Bike Pedals Are Hazardous
Worn pedals are not just a minor nuisance. They can cause severe issues, including poor cleat retention, which is extremely dangerous. Imagine riding full force against the pedal in a sprint, and your foot slips out.
Pedal Terminology, Models, And Brands
There is also some pedaling terminology that is helpful to know, such as:
- Stack – refers to the pedal height or thickness
- Float – the degree to which the pedal allows the foot to pivot and allows the knee to track naturally during the normal pedaling motion
- Spindle or Axle length – refers to the distance between the pedal body and the crank arm
Basic pedal models include:
- Clipless – Used with cleated cycling shoes
- Platform – Used often on BMX, urban, or recreational bikes to step on and start pedaling
- Clip – Toe clip pedals attach the foot to the pedal using a cage and strap
There are a few main types and brands of pedals. Some last longer than others.
Some well-known pedal brands include:
- Time
- Shimano
- Look
- Speedplay
Even if you only go up as little as $30, buying better pedals can make all the difference. The extra up-front cost may get you as much as five to ten times longer wear.
Serviceable pedals tend to last longer if they are well maintained. Whatever you do, avoid a pedal with a plastic body.
Some riders claim Time pedals last for years, sometimes more than a decade. Within that time, however, you will need to maintain them well, clean them, and repack the bearings every year or two.

Pedal Issues
If the issue with the pedal is a result of a loose axle or worn bearings within the pedal, it can weaken the axle or inside the pedal body. If you choose to ignore the issue, the pedal will eventually fail and won’t be able to freely turn.
The most common issue with worn pedals is the noise. Sometimes, a rider automatically wrongfully blames the bottom bracket or drivetrain for the noise with each rotation.
Locating The Bike Pedals Problem
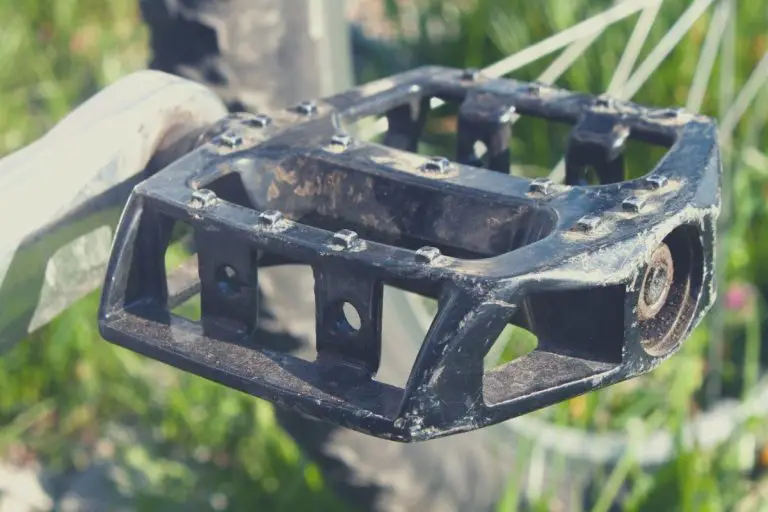
Take a close look at the pedals. Inspect the pedal body. Depending on the type of pedal, you may also need to inspect your cleats. Cleats wear out faster than the pedal.
Worn Cleats
Pedal cleats usually come with wear indication marks to show when it’s time to buy new ones. If you wear through cleats every few months, it may be time to think about how much time you walk in your cycling shoes.
If you do a lot of walking, consider buying MTB or touring shoes with recessed cleats which make contact with the ground less frequently.
You may also like to read Can Trail Running Shoes Be Used For Mountain Biking?
Worn Pedal Body
One tell-tale sign that your pedal body is worn out is if you are experiencing abnormal float. Abnormal float could indicate there is a groove worn into the front.
A rocking cleat could also mean a badly worn pedal body.
Lateral Movement
If you notice any lateral movement of the pedal body on the axle, have it fixed immediately. Otherwise, you are going to risk damaging the pedal beyond repair.
Repairing it may be as simple as tightening up the axle. Or, it could be time to replace the pedals.
Clicking Sounds
Any unusual sound from your bicycle is annoying at best and may be an issue that needs immediate attention. When you hear a clicking sound when you pedal, it could be coming from the pedal.
First, check whether your cleats are worn. Next, check to tighten the cleat bolts. Finally, look for any play between the pedal body and the axle.
If none of those fix the clicking sound, look for a small gap between the pedal body and the cleat, especially if you’re using Look Keo Blade pedals. Gluing a thin bar tape to the pedal body protection plate may help.
Worn Bearings
How do you know when your bearings or pedals are going bad? When the inner bearings fail, you will often hear a cracking noise.
If the inner bearings are ball bearings, they will wear out faster. Brass bushings stand up to wear and tear to last longer.
When you shop for new pedals, turn the axle. It should turn with perfect smoothness. If you feel any catch, it is probably using cheap ball bearings.
Also, if water, dirt, or mud gets inside the bearings, they will wear down. Find a pedal that has a seal to protect the inner bearings.
If the bearings are dry or worn, they are easy to hear. Listen for a soft whoosh sound. That whoosh could mean your bearings are dried out. Dry bearings won’t spin efficiently and can wear out the pedal.
Unless your pedals use ceramic bearings, you will want to lubricate the bearings with grease.
Unclipping
Unclipping unexpectedly is never a pleasant experience. When you launch a stinging sprint, it may happen because of an irregular pedaling action.
However, if unclipping occurs frequently, you will need to look to make sure the cleats are not worn or think about increasing the release tension if the pedal allows.
Related article – Are Mountain Bike Shoes Worth It?
Maintaining Your Bike Pedals
Before rushing out and buying new pedals, perform some easy maintenance. The good thing is that maintaining pedals is reasonably easy to do yourself. Maintaining the pedals is also less expensive than replacing them with a new set.
Grease The Bearings
First, clean the pedal thoroughly with warm, soapy water. Then, follow the manufacturer’s instructions for greasing the bearings since they differ. Also, clean and regrease the pedal threads while you’re at it.
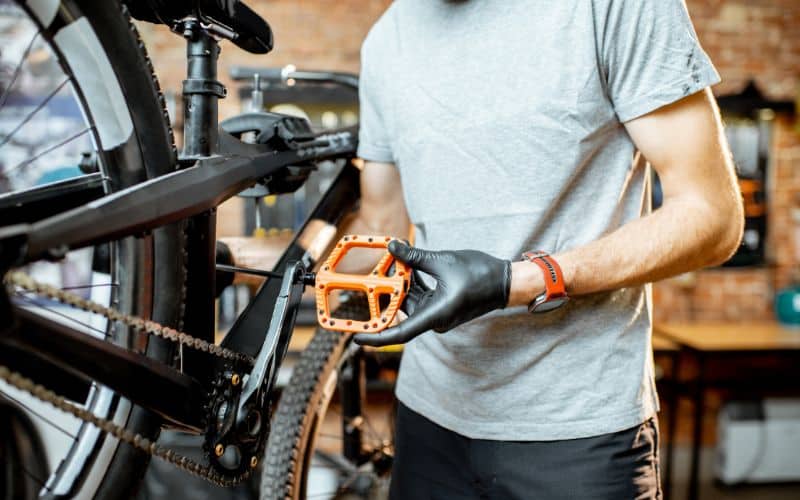
Replacing Pedals
When it is time to replace the pedal, remove any dirt, grime, and moisture with a towel. When the pedal crank arm and pedal is dry and clean, apply some grease to the pedal and crank arms threads.
Now is an excellent time to go ahead and clean the thread on the pedals and inside the cranks.
Follow these steps to replace the pedals:
- The right pedal usually has a small “R” on it. Align the pedal labeled “R” on the right side.
- Place the pedal into the crank arm.
- Screw the pedal into the crank arm by hand until you feel resistance. Then place the pedal wrench or spanner into position and start tightening. Use an Allen key to tighten the pedal from the inside. Or, use a pedal wrench.
- Apply waterproof grease to the bike threads in the pedal holes
- Newly installed pedals should spin freely
- Check the axle alignment by turning the pedal crank backward, and watch the pedals to ensure they stay in the same plane, perpendicular to the crank circle, throughout the entire rotation.
You may also be interested in: