I’m not sure how many times, back in the day, I’ve dealt with a slipped bike chain while peddling down the road with my neighborhood friends.
It was so embarrassing for me and Blue – that was my bike’s name – to be left behind from the group because she was, once again, broken.
Once I walked back into my house, prematurely. Mind you, I usually wouldn’t be home for another couple of hours. My dad would look at me and my sad face and know right away what he had to do.
The very next day, Blue would miraculously be fixed, sitting up on its stand by the shed, waiting for me to ride her until the next chain incident.
As I’ve gotten older and, thus, more self-reliant, I have since appreciated witnessing my father’s successes and, more often than not, mishaps, while trying to teach me what he had to teach himself about basic bicycle maintenance.
I would like to spare you as much as I can from some unnecessary trial and error “misadventures”. This article should get you up to a pretty decent understanding of your bike’s mechanisms.
First off…
An Important Thing to Know About Your Bicycle
You absolutely CAN fix your bike.
This isn’t an Apple iPhone you’re dealing with, mind you. Steve Jobs didn’t want any ‘ol Joe Shmo getting into the nitty-gritty of troubleshooting and fixing his unique products themselves.
This would take away from the mystique of what’s behind the curtain.
Most bicycle manufacturers provide riders with a DIY mindset. They help provide easy access to parts and repair manuals online for the bicycle owners’ convenience.
But, if you, for whatever reason, find the issue to be too complex and potentially risky to your budget, just send the bike to your local bike shop. After all, that is what they are there for.
A Few Considerations Before Taking Your Bike Apart
So, you have your bicycle in an uncomfortable, maybe upside-down position. You are dreading what that next, inevitable, step of action may be. All of your shiny, new bike tool kit are laid out in a sickeningly neat line from the smallest size to the largest.
Before you get too excited and start haphazardly stripping your bike of its parts, be sure you know exactly what the problem is. Check which particular component this problem affects.
Ok. Now that you have done some troubleshooting on your bike’s problem. You have narrowed it down to the drivetrain component set.
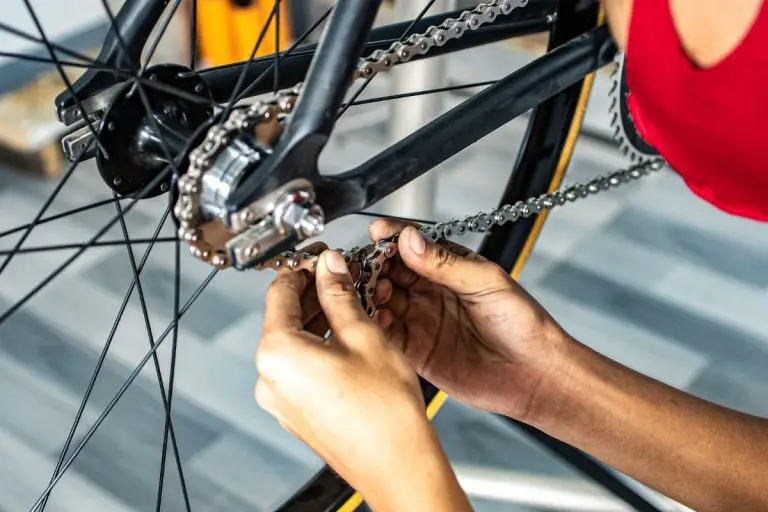
In this case, the problem involves the chain. Your bike’s chain is “slipping” or, in other words, “skipping” between the gears, also referred to as “cogs.”
Visually inspect every component involving your bicycle’s drivetrain. Checking for proper alignment and/or any obvious signs of physical damage such as chipping paint, scuff marks, or prominent dents.
If you remember anything from my own experience as I share these tips with you, remember this. Always begin your bicycle maintenance sessions with the least invasive repair strategy possible.
There Are Many Potential Culprits Behind Why Your Bike’s Chain Keeps Slipping
The most common reason why a bicycle chain may start slipping from its track is the shifting cables enabling the chain to move from one cog sprocket to another. It may be stretched and they have lost their tension. The cables could also be too tight.
Related article – How To Tighten A Bike Chain
Check The Cables
Moving on from the cables, you should check to see if the actual derailleur is bent or out of alignment. This usually only happens with mountain terrain-type bikes and can be caused by a jarring from hitting a pothole. It could also be by peddling your drivetrain under too much pressure.
Also, pay attention to the positioning of the front derailleur compared to the rest of the bike’s frame. It may be at an incorrect height, even if you have bought your bicycle as new.
What About The Cogs?
If your bike is older and has potentially suffered more wear and tear, the problem may be as simple as having worn-out cogs on your sprocket wheels. This will, of course, require the replacement of the affected gears.
Grease Lightly!
Lastly, don’t automatically go straight for the tube of lubricant for all of your bicycle problems. Placing just enough grease between metal joints is essential to your bicycle’s proper functioning.
Be careful though. Too much lube on any one of your bike’s components can cause your sprockets to become overly filthy over time. This can lead to the loss of contact between sprocket cogs and chain links. Use sparingly.
Every one of these reasons for a chain’s slipping problem is preventable with proper maintenance. If you find yourself in this situation, after all, it’s okay. You can fix it.
If you need a bit more help with some of the terminologies, read on below.
Become Well-Versed With Bike Ownership Terminology
According to an Ohio-based bicycle shop and repair blog post, there are thirty basic components that make up the body of a bicycle.
From your bike’s bar ends to its wheels, it is essential for any DIYer to know what they are looking at and what the function is for a particular component or part.
I wanted to give you a basic, yet functional understanding of a few bicycle part names; these parts are what makeup what is called a bike’s “drivetrain.”
So, let’s start with what a drivetrain is:
- Drivetrain: a set of parts working together to, essentially, “drive” your bike into motion by manual means. This term encompasses the following six components.
- Pedals: one on each side of the bicycle on which your feet sit and are pushed forwards or backward according to the type of bicycle you have.
- Cranks: known as cranksets when attached in pairs to a bike. If you look at your bicycle’s profile, these small metal pieces are painted with the same color theme as your bike. They are the pieces that attach each pedal to its corresponding bottom bracket axel.
- Crankset or chainset: convert your leg power, or torque, into circular motion. This propels your manual bicycle forward. They come in different lengths, averaging between 170 and 175mm. The latter is best used for a larger framed bike.
- Chainring or chain ring: a term referring to the bicycle’s front gears. An important part of the proper function of a crankset.
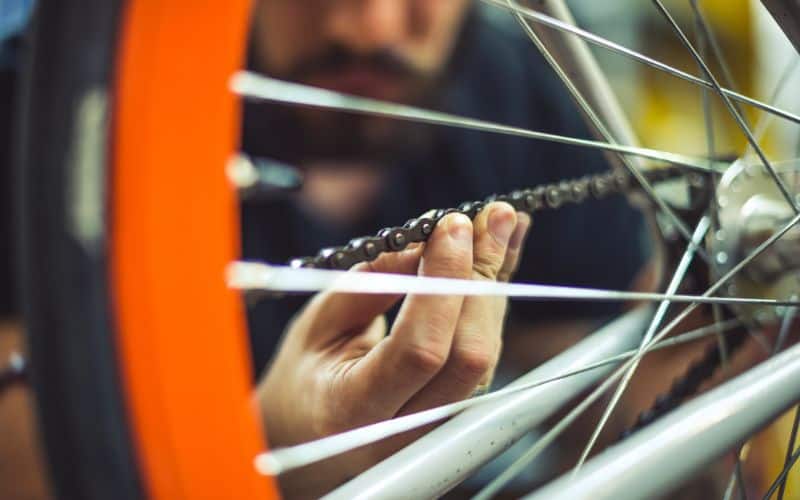
- Chain: usually equipped with 116 links, each link equaling to be approximately an inch in length; the chain’s total length is an important consideration in troubleshooting chain slipping. Is the chain too long or short?
- Cogs: refers to the “teeth” of gears, also called a sprocket wheel. The component specifically refers to the back wheel.
- Cassette: the finished assembly of parts comprising between eight and eleven cog sprocket wheels attached to the back wheel axel in descending order of size.
- Derailleur: only a function on multi-speed bicycles as opposed to a single. This is the mechanism responsible for shifting the chain from one sized sprocket on the cassette to another while releasing or taking up the chain’s slack.
Having a basic understanding of bicycle component compatibility is key if you eventually realize you have to disassemble your bike.
In particular, if a new chain is installed, it is possible that it could be too long or short. The chain should be taut around the largest diameter front chainring and the largest back cog sprocket.
If the chain is too long, it may cause another episode of slipping by dropping between gears. If the chain happens to be too short, it can put unnecessary stress on the derailleur system and can possibly damage the overall drivetrain.
Related article – Bike Geometry Explained – What Does It Mean?