With Zwift becoming more popular by the day (or it feels like that anyway!), it’s understandable that us cyclists want to be part of that… I did anyway but I wasn’t sure how much it would cost and what sort of setup I would be able to get for my budget.
Surprisingly, you don’t need to spend a lot for you to be able to use Zwift! On the other hand, you can spend a small fortune…but is it worth it?
I spent some time bringing together bundles for every budget and here’s what I found!
What Is Zwift?
First off…what is Zwift? Zwift links your turbo trainer or traditional trainer to what is essentially a game. Think gamification of exercise!
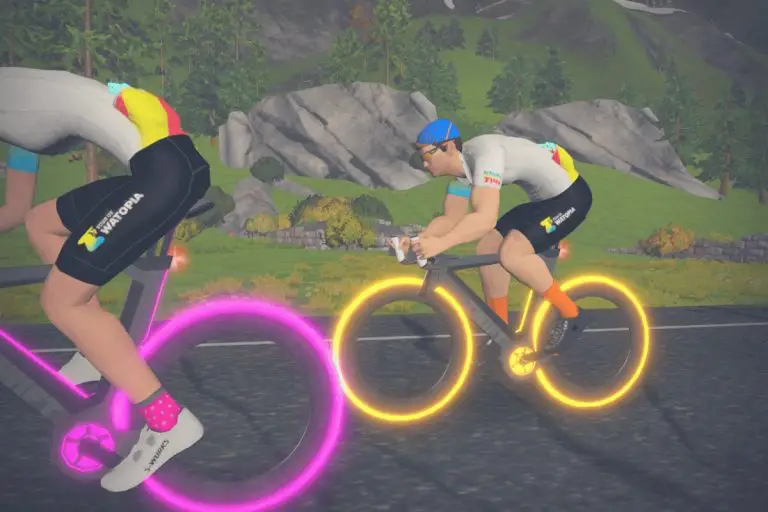
One of the huge attractions of Zwift is that it lets you ride with other cyclists in a virtual environment. Indoor riding was known for being quite dull, that’s no longer the case with Zwift! It allows you to compete in races with other Zwift users, complete set training programs – depending on your goals, ride with your family and friends, or simply do your own thing.
The training programs have been designed by professional coaches so they’re good quality and if followed you’re likely to see some improvements! When you compete in a race or event you are placed with other riders who have a similar FTP to yours so it’s fair play! What’s an FTP test? Find out here.
Zwift does claim that it can be better than outdoor riding. In some ways, I do understand their argument. You don’t have to worry about the traffic, headwinds, or time constraints. Though, in some ways, I think that adds to the fun of cycling!
Without question, Zwift has lots of appeal and certainly has its place in the cycling world.
Related article – How To Get The Zwift Tron Bike – Tips And Tricks

What Do I Need For A Zwift Setup?
To get started with Zwift you’re going to need a Zwift account.
You can sign up, either on a computer or a compatible tablet or smartphone using the Zwift app. There is the option to pick up a digital membership gift card through the main website, Zwift.com.
Depending on how you created your account, you will either get a 7-day free trial – this is if you sign up online – if you signed up through the Apple App Store you get 25km of free riding.
You can run Zwift on Windows, iOS, iPhone, iPad, Apple TV, and Google Play.
It seems that the majority of users run Zwift through iOS. I use Apple TV, though I originally started running it on my iMac. An Apple TV just has that edge as it’s a very cost-effective way to get Zwift on a big full HD screen.
Currently, the minimum requirements to run Zwift are:
- Operating System: Windows 7 x64 bit, OSX 10.8
- Processor: Intel Core 2 Duo
- Memory: 4GB
- Hard Drive: 4GB of free space
- Graphics: 1GB dedicated GPU, or embedded Intel HD 4000/AMD R5
What Is A Smart Trainer?
A smart trainer is a machine that you can mount your bike on. It gets its ‘smart’ name as the resistance it offers can be controlled by cycling apps, like Zwift.
A Range of Budgets For Zwift Indoor Cycling Training
How Much Does It Cost To Set Up Zwift?
To get a Zwift account, you will originally start with either a free trial or 25km to use. After this period you have to subscribe. You pay monthly and it’s either $14.99 / £12.99, with the ability to cancel at any point.
What Is The Cheapest Way To Use Zwift?
If you’re wanting to get started with Zwift in the cheapest way possible then the following is all you need:
- Your bike
- Set of rollers or a trainer
- An ANT+ or Bluetooth measurement device (e.g Wahoo speed/cadence sensors or a power meter)
- Compatible device with either Bluetooth or ANT+
For a lot of cyclists, this type of setup is where they want to start, they already have a lot of the equipment so the expense isn’t huge. To use Zwift, you can get started with any turbo trainer. The important thing is having the accessories to get everything connected.
Trainer
I would recommend the Saris Magnetic Turbo Trainer if you’re looking to pick up a simple trainer. It uses magnetic resistance to give you a nice frictionless ride, this also means it’s smooth and relatively quiet.
Sensor
As the trainer isn’t a smart trainer, you’re going to need to get Zwift to talk to your trainer and for that, you need a sensor. You may already have one, if so you’re sorted.
However, if you don’t I’d go for the Wahoo Cadence and Speed Sensor. Super simple to set up.
The cadence sensor attaches to one of your pedals – Wahoo includes everything you need to do this. Whilst the speed sensor is fitted around your rear wheel – again Wahoo includes everything you need to make this happen.
To get your sensors and Zwift to talk to each other, you will need to pair them through the Zwift app.
- Ensure your sensors are fitted correctly and the batteries are new.
- Open up Zwift and log in
- When you’re logged in a pairing screen will appear. Under the ‘Speed Sensor’ option, hit the ‘Search’ button. Your sensor should appear. If it doesn’t, I pedal a few times and this generally wakes things up.
- Zwift will then prompt you for your tire size and then you’ll be able to press ‘OK’.
- It should then take you to the option where you select the model of your trainer. Find your model and select it.
- Depending on the trainer you have, it may have different resistance settings (like the Saris trainer I mentioned earlier). Zwift will recommend which setting you should use. Keep it in that mode when you’re using Zwift.
- If your trainer doesn’t appear on the list, there is the option to click ‘Not Listed’ or if you’re on rollers, there’s an option for that too, ‘Unlisted rollers’. One thing to note is that if your trainer isn’t listed then your power estimates may not be as accurate. Pro tip – Whatever you do, don’t select a trainer on the list that isn’t yours, the power estimates won’t match!
- Now you can pair your cadence too. You may need to turn the pedals to get the sensor to wake up and appear on the list.
Once you’ve completed those steps, you should be greeted with the ‘Startup Screen’ – choose your route and ride!
Related article – Can You Use Zwift Without A Smart Trainer?
Yoga Mat
Trainers aren’t silent when you’re using them. Depending on where you set up your trainer, this may be an issue but there are steps you can take to dampen the noise down.
I have my trainer set up in the spare bedroom so I do want to limit the amount of noise it generates so as not to be too inconsiderate to anybody in the kitchen below. I went for an easy option, yoga mats.
They’re inexpensive, pretty much the perfect size too. You can pick up yours here: Amazon Basics yoga mat. Nothing fancy (though you do get a range of colors!) but it does the job.
One bonus I didn’t think about was that it does a great job collecting the sweat (you’re going to sweat a lot). My room is carpeted so it goes a long way to protecting the carpet from my perspiration 🥵🥵🥵.
Fan
As I mentioned above, you’re going to sweat. You’re going to sweat more than you expect to so a fan is essential.
Any sort of fan will do, this one from Honeywell is a good cheap buy, just make sure to get it in the right position and it should do the job.
Affordable Mid-Tier
Taking things up a level is where you’ll see wheel-on smart trainers and a few extra accessories to enhance the quality of the workout and Zwift tracking.
The benefit of going for a wheel-on smart trainer is that it truly opens the Zwift world, without the need for additional sensors. In other words, it keeps things simple.
Trainer
If you’re looking for an affordable mid-tier smart trainer, I’d go for the Saris M2. Firstly, it’s affordable and packs a load of features into that price tag.
The performance is comparable to direct-drive trainers and that’s impressive. If you’re interested in figures and keeping track of your performance, it’s important to have the most accurate figures possible. Saris claims the power accuracy is +/- 5%.
Sounds reasonable, right? The reality is even better. In tests, it was shown to be closer to 3% power accuracy!
You will need a trainer riser block too. A lot of trainers come with these but if yours doesn’t, you can pick one up fairly cheaply, here.
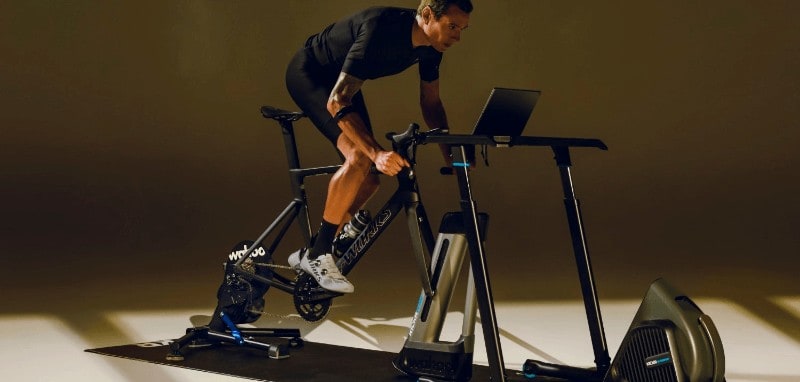
Trainer Table
At the mid-tier point, I’d recommend a trainer table to put your laptop on, if that’s how you’re running Zwift.
It ensures that the screen is eye level and it isn’t precariously balanced on things…you know exactly what I’m talking about, don’t you!?
If that sounds like you, RAD fitness desk offers a great option. It’s height-adjustable and big enough for you to keep a spare water bottle on there too!
Specific Trainer Tire
Using the same tire as you use when you’re out on the road can cause the tire to wear out more quickly, which is why I’d recommend using a tire specifically for turbo trainers.
Tacx trainer tire does an amazing job and it’s a popular choice. It also has the added benefit of not being quite as noisy as your usual tire!
Fan
As I’ve said before, fans are essential and if you’re spending a bit more, it’s worth investing a bit more in a better fan.
I would recommend the Lasko fan. It comes with different settings so depending on how intense your workout is, you can vary the amount of cooling you need.
A thing I like to do is, set it on a relatively low setting and when I’ve reached a certain milestone in my workout, I allow myself a better cooling setting…do what motivates you I guess?
The Ultimate Zwift Setup
You’re ready to splash that cash? When you’re looking for the top-end of Zwift setups, you’ll be looking at direct-drive smart trainers.
What this means is that the rear wheel of the bike is removed and the bike is connected to the trainer via a standard cassette.
Why is that good?
It means that your rear tire doesn’t wear and generally, you get a better power accuracy. There are other benefits too, direct-drive trainers tend to be quieter and give you a more realistic feel than other trainers. This is due to the larger flywheel.
As the rear tire is removed, the risk of it slipping is no longer there and this can mean that you have the support to achieve higher wattage outputs and they are capable of simulating steeper gradients – again, giving you that more realistic ride feeling.
Trainer
A good entry into the direct-drive trainer world is the Tacx Flux S. It doesn’t have all the specs of a lot of its competitors but it does provide the vast majority of riders with more than enough power and resistance.
It can be quite easy to overdo it and think you need more than you do. We’re all guilty – but genuinely think about your ability and you may find that the Tacx Flux S meets your requirements perfectly!
If you’re wanting a trainer that is simple to use, is portable, and stable then it could be worth paying a bit more and going for the Elite Suito. It does produce a bit more noise than other direct-drive trainers so that may be a consideration for those who need to keep the noise down.
Otherwise, it’s a good option and it folds into something you can slip down by the side of the sofa when you’re not using it!
TV
A truly immersive Zwift experience is enjoying it through a TV. Get a TV big enough and you’re going to feel like you’re racing for real!
For this, you might want to treat yourself to a Samsung 55” Smart TV. It’s 4K so the graphics are going to be top-notch.
Getting Zwift onto your TV can be done in a few different ways. If you have a compatible tablet, connect it to your TV via HDMI. If you don’t already have a compatible device, then the most seamless way is to pick up an Apple TV 4K. Whilst we’re still on tech, a pair of indoor cycling headphones can really help you crank up the training a notch too!
Fan
When we’re talking about top-end fans, there’s one that immediately springs to mind and that’s the Wahoo Kickr Headwind.
It can simulate a headwind of up to 38mph and the speed of the fan can be controlled by how much effort you’re putting in. To do this, it measures your heart rate, power, or speed.
Wahoo Kickr Climb
If you have a Wahoo Kickr trainer then you can pair it up with the Wahoo Kickr Climb, to take your indoor riding to a new level!
The Climb attaches to the bike’s front dropouts and can simulate climbs of up to 20% and descents of -10% – giving you a truly immersive experience!
All-In-One Solutions
The all-in-one solutions can provide you with a hassle free Zwift set-up and if you love Zwift and have the cash to spend, why wouldn’t you?
Wattbike Atom
A new take on the original Wattbike, with plenty of improvements. For an indoor exercise bike that you can use daily (and you’re going to want to!), the Wattbike Atom has a lot going for it.
It comes with a huge range of resistance settings, giving you that realistic riding feeling.
The set-up is simple and making adjustments to fit different riders can be done quickly. One disappointing surprise is that you can’t connect the Wattbike Atom to any wearables and there isn’t a USB port to charge your phone for example.
I have to be honest, these are definitely first-world problems and this bike is honestly a fantastic piece of kit that will keep you coming back for more.
Wahoo Kickr Bike
As with many of Wahoo’s products, the Kickr bike has set a new bar for all-in-one indoor bikes.
It’s currently the only bike that gives you gradient adjustments that it can achieve. This is huge as it adds to the realism and honestly, it makes it more fun and engaging!
The shifters on the Kickr are smooth, quick, and effortless. As for power accuracy, you’re looking at +/- 1%…yep, impressive.
If we’re looking to balance things out, there’s no getting away from the fact that this bike is expensive but for some, it’s worth it for the perfection it delivers.
Tacx Neo Bike
The Tacx Neo is smart and it’s high-quality.
It’s also very simple, which will appeal to many people, I’m sure. When you need to adjust different elements, this is easy to do and that counts for a lot in my book.
It does come with two fans, which seems like a good idea but it’s one of those cases where theory is better than practice. That’s not to say they don’t provide some purpose, they’re small-ish so you’re still going to need an additional fan.
The Tacx Neo isn’t the most stable so if you like to train hard, you might find stability a bit of an issue. Though all things considered, it’s a great option for those who are wanting an all-in-one solution to indoor training.
Frequently Asked Questions
Can I put Zwift on my smart TV?
To enjoy Zwift on your Smart TV, you need another device to connect it to. A smart TV on its own is not powerful enough to run the Zwift program.
An Apple TV is a good option, especially the 4K option but the 4th Gen will still work well as a way to broadcast your Zwift-ing sessions.
You can also use an HDMI to connect a laptop or tablet to your TV.
Is Zwift worth it without a smart trainer?
To get the most out of Zwift, I would recommend a smart trainer.
If you don’t have a smart trainer you can still enjoy Zwift with a classic trainer, speed, and cadence sensor and it will be completely worth it!
Do turbo trainers ruin your tires?
If you’re using your turbo trainer a lot, then you will notice that your tire wears more quickly than if you were out on the road.
Though if you don’t use your turbo trainer that much, it might not be worth having a specific tire for it.
A dedicated trainer tire does bring about some benefits though:
- It’s going to last longer than your regular tire, two to four times longer;
- Can decrease the noise from the turbo;
- Data from your turbo can be more accurate when using a turbo tire; and
- The risk of slipping is minimized.
So when does it become worth getting a dedicated trainer tire?
I use the rough rule that when I’m spending more than four or five hours a week on Zwift, then it’s time to swap out the tire for a trainer-specific one.
You don’t necessarily need to spend a fortune on a turbo tire, you can just use an old tire and you would still get some of the benefits mentioned above.
Is the road or turbo trainer harder?
This is a debate that never seems to end and there are so many opinions!
According to Garmin, one hour of indoor cycling is equivalent to two to three hours of road cycling.
Roughly 10% of your time on the road is spent freewheeling. This can go up to 40% if you account for descents on hilly rides!
If you’re on a turbo, you just have to keep going and for that, it’s tougher.
Final Thoughts On Zwift Setup Ideas
There you have it – a Zwift setup whatever your budget!
To use Zwift you don’t have to spend a lot, though as ever with cycling if you want to or just can, splash out for the ultimate set-up!
Either way, I’ll see you on Zwift!
Hey Harry! I’m searching about the “How to Zwift” subject and came across with your article 🙂 (great btw!). What’s your opinion about elliptical bikes? I’m trying to understand if a bike like “ Schwinn 510U” would kinda make me feel Zwift at maximum.. thanks!
Hi João! Thanks for stopping by! I’ve never tried Zwift with an elliptical bike, but looks like the Schwinn 510U does sync with Zwift. I’m not sure if it would automatically change resistance, but you can adjust the settings yourself as you ride! I say better to do some exercise than nothing 🙂